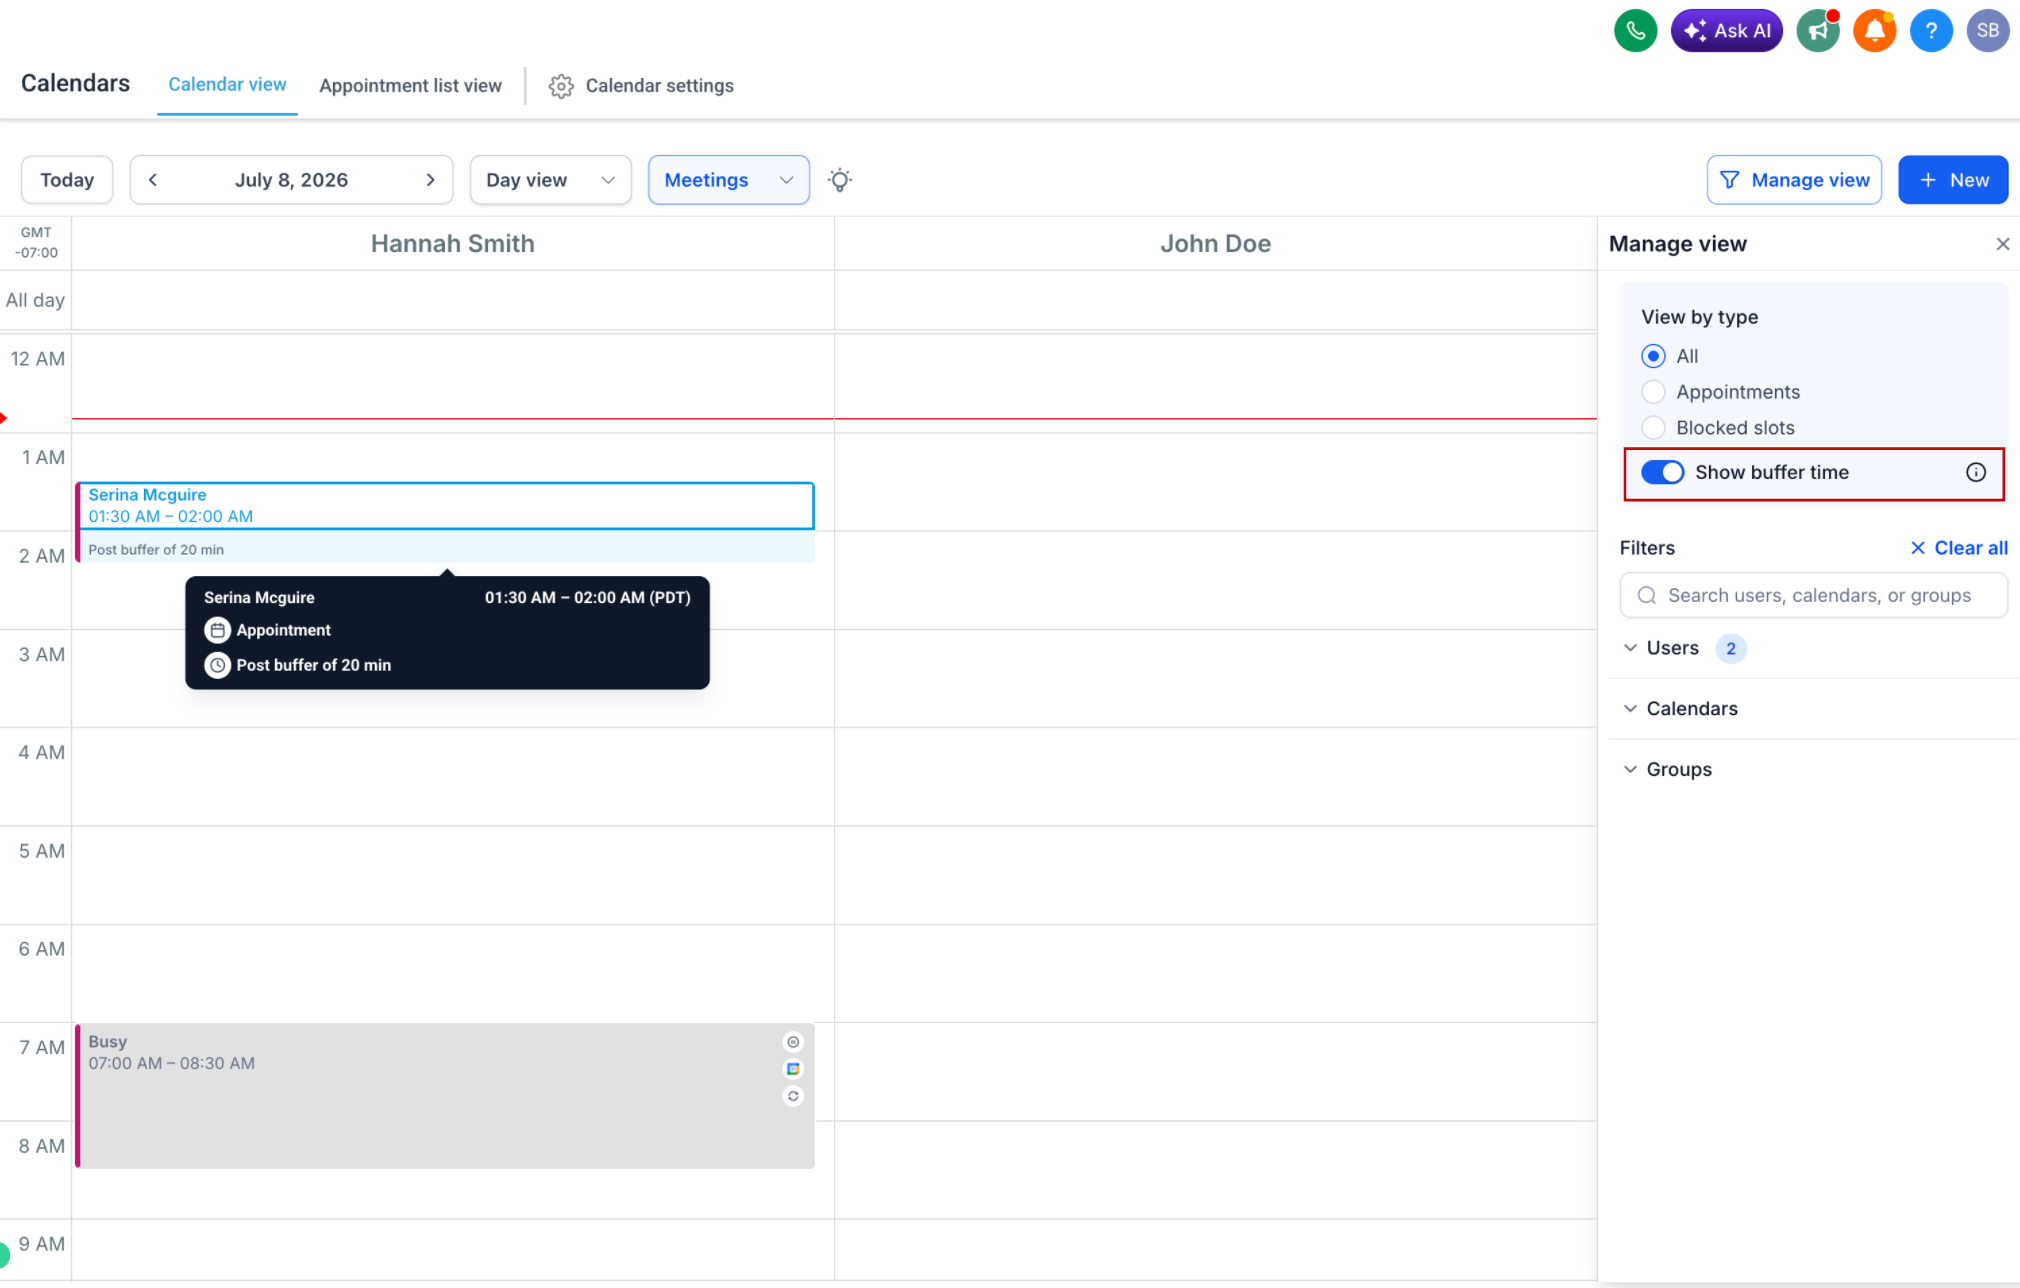
You can now visually see pre-buffer and post-buffer times directly in the Day and Week calendar views. Buffers are displayed as informational blocks, making it easier to understand appointment spacing without affecting scheduling flexibility.
What's New
Before
Buffer times were applied behind the scenes but were not visible in the calendar.
It was difficult to distinguish between actual appointments and the buffer time surrounding them.
Now
Pre-buffer and post-buffer times are displayed in both Day and Week views.
Buffers are visually distinct from appointments, making your schedule easier to interpret at a glance.
Buffer visibility works across all calendar filters, including:
Staff/User
Service/Calendar
Category/Group
How to Use It
Go to Calendars.
Switch to the Day or Week view.
Turn on the Show buffer time toggle.
View the highlighted buffer periods before and after appointments across all supported filters.
Why This Matters
Gain a clearer view of your schedule at a glance.
Easily identify transition time between appointments.
Plan your day more effectively while maintaining scheduling flexibility.
Better understand buffer allocations without changing how appointments are booked.
Was this article helpful?
That’s Great!
Thank you for your feedback
Sorry! We couldn't be helpful
Thank you for your feedback
Feedback sent
We appreciate your effort and will try to fix the article